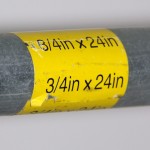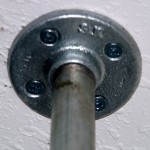
It all started off with Pinterest. (It’s become a serious addiction people) The inspiration became an actually possibilty then turned into a trip to the local hardware where I bought the supplies and only spent less than $50. The price may not be accurate due to a love of candy at the register and a couple interior design magazines. Guilty, I know. Anyways……THEN, it was a reality. (More like a dream come true) I’ve always wanted a clothes rack in my room, but NEVER had the space for it until a little “feng-shui-ing” did the trick. This has to be one of the easiest projects ever. I think the hardest part is the drive to a hardware store, not even. I bought 3 pipes (3/4 in width is perfect for a standard hanger), 2 elbows, and 2 of those flat things to screw it to the ceiling. I think I might as well call ’em “feet”. Seems appropriate right? All you need to do is just screw all the stuff together and into the ceiling and VIOLA! You have a clothes rack! It’s so much more convenient to have this in my room especially when designating my outfits for the week. Plus, it adds that pop of color to my white walls.


[black wood hangers: IKEA. pipes & supplies: Home Depot]

You are so clever, I love your idea! I will have a try when I get home as well, it looks funny.
http://www.abercrombieukclothing.co.uk/
I used this today for my weird shaped closet!!!!!!!!!!! Thanks for the tutorial!!
Did you have to find a stud or anything in the ceiling? Not sure if those are even in my ceiling but they’re in my walls. : ) About how many pieces of clothing does your rack hold?
Hi Kelli,
Because of the weight of the clothes rack + weight of the clothes, in order for it not to collapse – I needed to screw it to a stud in the ceiling. I also had a carpenter come over for some help with that.
Hope this helps! (Sorry for the late reply)
xx
Ashley